April 18, 2011

BBTB2 Challenge: Pineapple

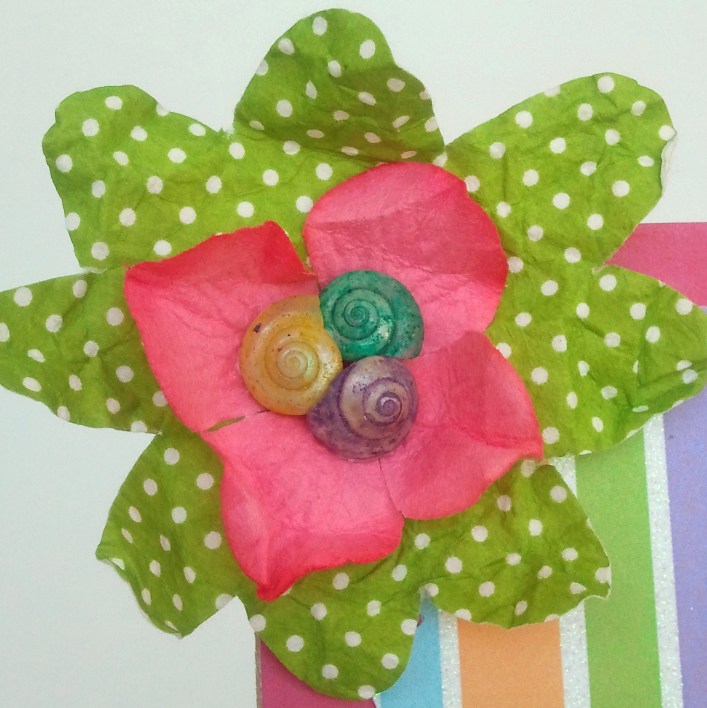
What a fabulous challenge for this week over at BBTB2!  We had to use a pineapple cut so I cut my pineapple from the Paper Dolls cartridge.  Living in Florida now, I wanted to create wall decor for our home.  I cut the pineapple twice, one from yellow patterned cardstock and another from green patterned cardstock.  I traced it onto brown cardstock and hand cut a shadow for it (the cartridge doesn't have a shadow, or layers for the image).  I also traced and cut the straw from a red striped paper, just like the old time soda fountain straws!  I embossed the yellow cardstock and inked it in brown.  I took gift ribbon, and curled it in different directions then attached it to the leaves of the pineapple, adding a green flower and rhinestone to the center.  I wrapped the entire pineapple with bakers twine and attached it with pop dots to the wall hanging.  The background for the wall art is an 8.5 x 11 piece of corrugated cardboard, covered with melon colored paper and topped with a border punched glitter stripe cardstock.  It made me think of a beach towel!  I then added alpha letters to spell "Welcome", and paper flowers with sea shell centers.  Go see the other designer's creations at BBTB2!  Have a wonderful week!

Miles of Smiles,


April 11, 2011

BBTB2 Challenge: Egg

Yay! Spring is here!  I love seeing all the trees and grass get greener, flower buds bursting into full bloom, sunshine, blue skies, and a soft breeze. What a wonderful season! Our challenge for BBTB2 this week was to use an egg.  I cut a large 11.5" cardstock egg from Doodlecharms.  I covered the entire egg with printed tape from Making Memories, Martha Stewart, and Anna Griffin. I then trimmed the tape to the shape of the cardstock egg. I attached chipboard letters to spell "Easter." I tied a plastic twine ribbon around it, and created a handmade flower from the plastic twine as well, and added Stickles to the center and to the edge of the petals. I then added metal foil flowers randomly, and finally outlined the entire egg with Stickles.  I then attached a hanger to the back of it to hang on my wall.  Go see the other fabulous creations from the other designers on BBTB2!

 Miles of Smiles,

April 10, 2011

Secret Sister Swap: Wall Art

The final item for the Secret Sister Swap was to make an item for my secret sister to hang in her scrap room. I used a thick piece of corrugated cardboard as the base for this project. I covered it with patterned paper, created a pocket for a photo or journal tags, added a photo sleeve to hold a photo, affixed letter stickers to spell "moments", some paper and silk flowers, and finally a few pretty brads to complete the ensemble.  The cool thing about this wall decor is that it can be hung as pictured to hold a portrait photo, or turned 90* counter clockwise to hold a landscape photo.
Miles of Smiles,

Secret Sister Swap: Easter/Spring

Here is the second item I made for my Secret Sister Swap. I covered a paper mache' egg with patterned paper that has purses,  lipstick, shoes, a compact, etc.. on it. I thought this was appropriate as my secret sister sells Mary Kay cosmetics. I added a double layer of lavender and purple ribbons, with a ribbon bow on the top attached with a fabric brad. I cut off the legs of several purple pearl brads and attached them to the egg with foam dots. I then created the base for the egg from two cardboard rings glued together and covered with pleated satin ribbon. I added a tulle circle below the egg for a little more "frou-frouiness", then stood the egg in the base.

Miles of Smiles,


Secret Sister Swap: Altered Container

Back in December at our Merry Christmas Crop, we decided to have a Secret Sister Swap. This weekend we finally got to swap our creations and find out who our secret sister was. It was really fun, and ohmygoodness, those girls just make the coolest stuff! We had to make three items: an altered container, a spring/Easter item, and something to hang in your scrap room.  This is the altered container I made. I took one of those plastic photo boxes and jazzed it up. I added a coordinating ribbon handle, patterned paper cover, embellished with acetate swirlies, paper flowers, felt flowers, a felt bird, rhinestones, and alphabet stickers.  I also added a coordinating strip to the edge. I thought it would be good to use to hold photos (duh!), or maybe store and transport other embellies for a project my swap sister would be working on.

Miles of Smiles,


Be Original

OK, so if I have to explain a card, I suppose I didn't quite get my point across, right?  LOL  My friend gave me a challenge to use the {ugly} red silk daisy she had. It had a yellow fuzzy center and yeah, it was pretty hideous. I happened to have the daisy patterned paper, and I thought, Oh I know what to do! I started with a red cardstock base, layered with the daisy patterned paper.  I took the ugly daisy apart, adjusted the petals, and put it back together with a cool blue polka dotted brad. I layered the red daisy to a pale yellow cardstock, centered it on the card, and Stickled the black "eyelashes" and edges of the daisy petals. I put the "Be Original" rub-on onto pale yellow cardstock, tore the edges, and matted it with red cardstock. Finally I added the blue metal dots to the corners, to pick up on the blue in the center of the daisy.  OK, now look at the background paper...all the same white daisies, with yellow polka dotted centers....Now look at the one, unique red daisy with a blue polka dotted center....Get it???  Be Original!  Oh well, it gets lost on some.  What can I do?  LOL

Miles of Smiles,

Vintage Butterfly

Another vintagey card I made using a sage green card base, soft floral patterned paper, pink cardstock, brown polka dot sheer ribbon, silk flowers, and paper flower petals. I added the chipboard butterfly with pearls, and pearl in the flower centers. I attached the smile clip to the ribbon and the paper. Finally a dotted rub-on to the edge.

Miles of Smiles,


Sweet Popsicle

This was a quick and fun card I made recently. I used a bright blue cardstock for the base, layered with a light blue cardstock and ice cream treats patterned paper. The edges are inked in brown. I attached a light blue rectangle, then a chocolate brown satin ribbon. On top of the ribbon, I attached a chipboard popsicle with foam dots, and chipboard letters to spell "sweet". Some of the letters are thicker creating more depth.

Miles of Smiles,

Birthday Roses

I made this card for someone very special. It is a birthday card created from sage green cardstock base, baby blue border punched cardstock, and vintage French script patterned paper.  I half-matted the image in baby blue on the left, and sage green on the right. I added Stickles to the roses in the image. I attached a metal plate that reads "Celebrate". I layered several paper leaves and flowers, bending them for added dimension, and finally pearl flowers for the centers, with Stickles along the edge of the flower petals. I think it turned out very soft and sweet.

Miles of Smiles,

Shoegether Forever

I had this image that I wanted to color, but this girl has sass, so I couldn't just make a cutesie card. I used orange and teal cardstock with a layer of pink patterned shoe paper. I used a few chipboard pieces, brown flowers with giant rhinestone centers, polka dotted ribbon, and I hand wrote "Shoegether forever" on the chipboard tag. Cuz you can't separate a girl from her shoes!!! Can't you just see this gal shaking her head, saying, "Oh no you DIDint"?  LOL
 Miles of Smiles,

Challenge Winner

Back in February, a friend won a trip at CHA for a scrapbook get away in South Carolina. She got to bring many friends, and I was lucky enough to be one of them! We drove up on a Thursday night and left Monday morning. It was a 9 hour drive!! But it was worth it because we all had a blast! When we got to the store where we could set up to crop, there was a baggie with several different paper crafting items. The challenge was to use everything in the baggie to create a project. We were allowed to make any type of project (layout, card etc...) but we had to use EVERYTHING in the baggie. We were also allowed to add items from our own stash. Soooo....I found this adorable bare frame at the store on clearance for like $1.29 and that is what I chose to use as the base of my project.  I added the vintage image, the script paper, love stamp, and gold crown to the items already included in the baggie.  I could still put a photo into the frame if I want, because I placed the vintage image beneath the acetate. The store keepers were the judges, and hooray! I was chosen as the winner!  We had such a great time, and I'm so glad we got to go.


 Miles of Smiles,