November 4, 2014

Halloween!!

Also the name of our pup
Check out the boa, hat, and bling
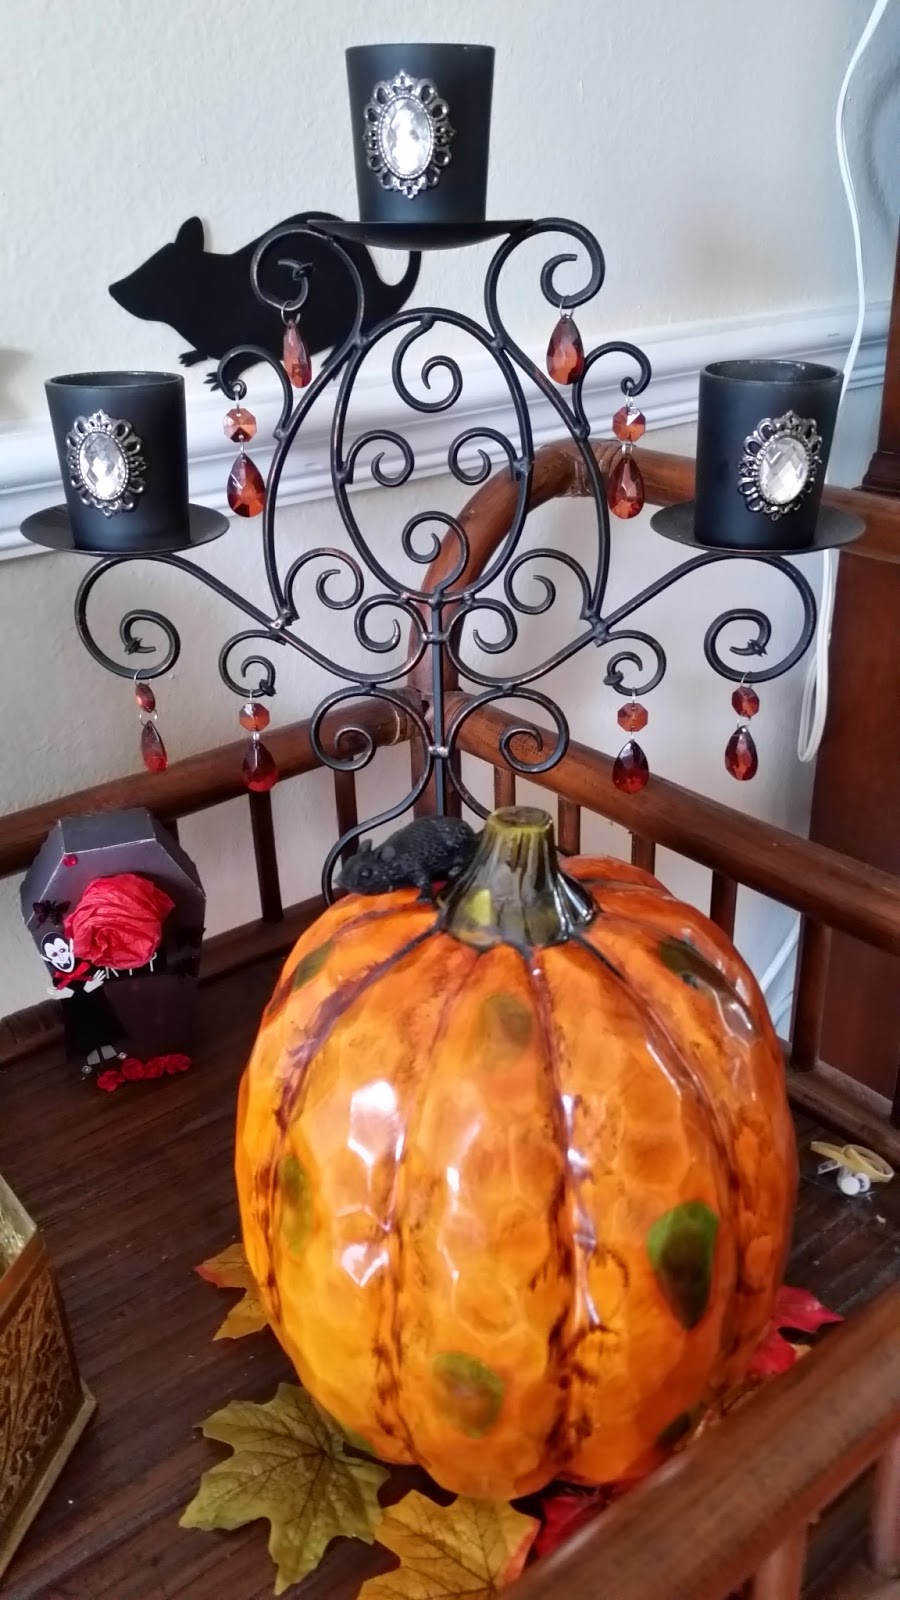
Here is a sampling of our house for Halloween.  


Masquerade masks on the pumpkins
Player piano with witch hats for guests
Halloween mantel and fireplace


Above the mantel


Inside the fireplace
The cauldron has color changing lights and looks so cool at night


Hand painted roses, added eyeballs, snakes, cobwebs


Brooms in the Broom Lane at the entrance to our home


Middle hat is mine; decorated them all myself
Birdcage with rat, bat, and owls on top.

Owl with masquerade mask & witch hat
Homemade Spells and Potions books


Boney Bunch by Yankee Candle steampunk raven candleholder

Creepy phone from Target and another homemade "phone book"

Paper lanterns galore


Homemade banner on china cabinet


Another Boney Bunch figure, candy dish. I put an LED candle in it.

Homemade Alice in Wonderland Halloween Tea sign

Homemade ornaments, branches from tree


Apothecary jar with witch nose, mask, hat


Above the lanai doors

Tree, candles, raven skeleton. Handmade medallions with tulle.

Cackling witch by front door
Coffee cup with skull in kitchen

Spooky Smiles,

Paperback Pumpkin

I made this pumpkin from a paperback book! I learned how at a local crop I attend each month. It was pretty easy, looks super cute, and folds back up to a book when I want to store it. My friend sprayed hers with orange and green ink and it looked fabulous too!

Miles of Smiles,

Boss's Day Vintage Card

I fell totally in love with this card. I made it for my boss for Boss's Day. I started with a cream card base, and topped it with a vintage swirl/damask-ish patterned paper that I inked and distressed the edges. I topped that with another vintage-y pattern that was also inked and distressed. I punched out two leaf wreaths and cut them to make the vine branches. Those I glued on top of some iridescent angel hair. I made the roses out of cream paper and added pearls to finish it off. {Vintage love} !
Miles of Smiles,

Retirement Card

I made this card for a dear co-worker and friend who retired recently. (I'm so jealous! lol) I started with a white card base, covered with a blue damask patterned paper. I added a vintage journal card, a vintage girl image, and fabric cloud stickers. I cut out the bird on the journal card to slip the girl image behind it. It might seem odd to say Places to go! and People to see! and have the image of the lounging girl, but that was exactly what I wanted.  Inside it said, Or do nothing at all! Just like the carefree girl. I will miss my friend at work but I am so happy she gets to have so many new adventures to look forward to, and some time to just relax!

Miles of Smiles,

Make Your Own Enamel Dots

So I had to get on the bandwagon of trying to make my own enamel dots, which are so popular right now. All you have to do is melt pony beads in your oven/toaster oven. I took my toaster oven outside on our lanai because I was afraid the melting plastic beads would smell. Surprisingly, it didn't seem to have any odor. I set it at 425 (I think) and placed the beads on parchment paper, then on the metal baking sheet. I kept my eye on them, and when they all looked melted, I took them out. It was about 7 minutes, give or take a couple minutes. It depends on how large or small the beads are to begin with. Overall, I liked how they turned out and will probably do this again.

Miles of Smiles,

Owl Birthday Card for Mom

I made this card for my mom's birthday. I started with a white card base covered with a metallic lavender paper that I embossed with a vine pattern, corner punched with rhinestones.  I ran a green velvet ribbon down the center.  Overlayed with a white punched leaf wreath, and a lovely white lace medallion that is 3D.  All the owls are 3D too. I made a matching envelope with the same owls and some washi tape with owls too.
Miles of Smiles,

Father's Day Cards

As I try to catch you all up with what I've been up to the last several months, let's go back to June and the Father's Day cards I created. I used Graphic 45 (my fave) patterned papers, added some ribbon or baker's twine, and some K & Co. images of shells and fish. I think those images look great with the G45 papers!  The one with the crab was for my FIL, who lives in Maryland, so the crab was very appropriate. And the fish was for my dad, who loves to go fishing, and tell fish stories!  LOL
Miles of Smiles,

Happy Birthday Stars

Birthday card for a friend. Pink card, embossed cream cardstock, striped stars with buttons and baker's twine, all wrapped up in baker's twine.

Miles of Smiles,

April 15, 2014

Easter Cards 2014

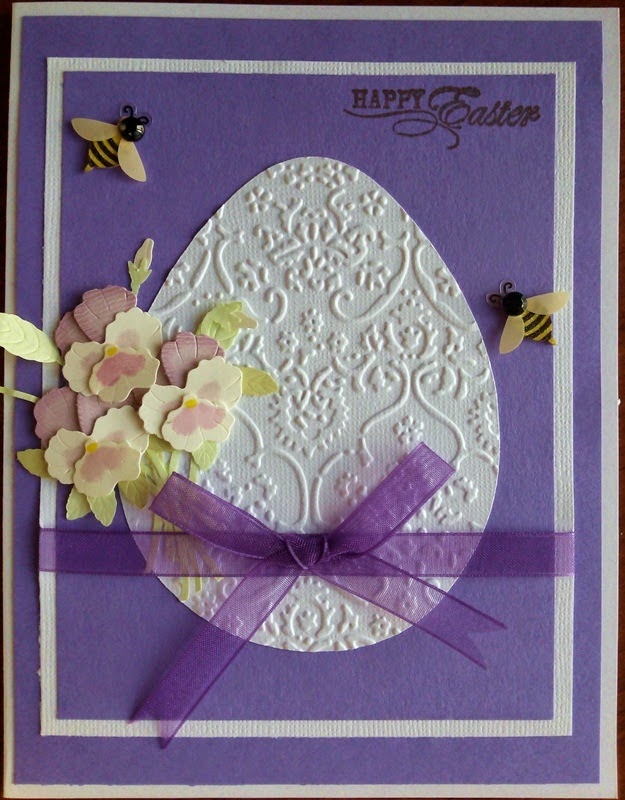
Last night I feverishly created 10 Easter cards to send to family. It was a whirlwind as this activity had completely slipped my mind over the weekend.  Ooops.  After narrowing down the mailing list, I thought 10 MIGHT be doable, if I could come up with an easily replicable template. Voila! I cut the egg on the Cricut from white cardstock and embossed it with the cuttlebug. To the 6.5 x 5 card I added ribbon, stickers, and a rubber stamp. All I really changed was the colors and ribbons for each card. It completely devoured my evening, but I'm glad I got them done. Hopefully snail mail will get them there by Saturday. Fingers crossed.  Happy Easter!!

Miles of Smiles, 


April 2, 2014

Paper Cake

This is the paper cake I made for my boss also. I've always wanted to try and stack boxes and decorate them to look like a cake, but I wasn't sure how it would look. Would it look like a cake or just stacked boxes? I cut the boxes from the Cricut using the Artiste cartridge. One thing to note is these boxes is that the sides don't glue together. The lid is what keeps the sides up. So I used some scotch tape on the inside to hold the sides together. You'll notice the boxes are actually upside down, lid on the bottom. At first I was going to add goodies inside, but after I decorated it, I thought taking it apart to get to the goodies would compromise the decorations.  The boxes are cut at 2", 2.5" and 3".  The lids are cut from coral cardstock and before I assembled them, I border punched the edges.  That gave me my decorative "frosting" look.  The flowers are Imaginisce assembled and layered flowers.  I cut the swirlies from the same cartridge at 1" and 1.25". I used Jolee's frosting stickers for the upper frosting decoration, different on each layer.  The top flower decoration is propped at an angle using layers of foam dots behind it.  It was too flat before I did this and added to the overall look of the cake. The flag/candle is a paper straw covered with washi tape and a silver bead in the top.  The flag is a punch out from K&Company that I bent and glued to the straw. I punched a small hole in the top cake layer to insert the straw. Don't make the hole too big or the straw will be wobbly.
Miles of Smiles,

Bicycle Birthday Card

This is the card I made for my boss's birthday. The tree was cut on the Cricut from the Pagoda cartridge and the bicycle was cut from Sweethearts, though it was originally a bicycle built for two, and I altered it to accommodate the card. I embossed the green panel and added 3D butterfly stickers (K&Company). I punched the tiny coral flowers and used bronze Stickles for the centers, and the blue Prima flowers have green rhinestone centers.  I also punched the corners.

Miles of Smiles,

Cupcake Birthday Card

Here is a birthday card I made for a special friend. The cupcake was cut using the Cricut (I can't remember which cartridge) and embossed with the Cuttlebug. I added pom poms "sprinkles" to the frosting.  Some bling swirls decorate the edges and the rosette is made from washi tape.  I layered some pink ribbons on the bottom and added a chipboard "celebrate" banner.  It's a happy card and looks yummy too!
Miles of Smiles,